How to Make a Lithium-Ion Battery: A Transparent Look at the Process
At LEOCH, we believe knowledge empowers innovation. As a leading lithium-ion battery manufacturer, we’re pulling back the curtain to show you how these marvels of modern engineering are created. Whether you’re a curious consumer, a tech enthusiast, or a sustainability advocate, this guide will walk you through the journey from raw materials to the powerful cells that fuel your life.
What is a Lithium-Ion Battery?
Before diving into how to make a lithium-ion battery, let’s break down what it is. A lithium-ion battery is a rechargeable energy storage device that powers everything from smartphones to electric vehicles (EVs). Its core components include:
-
Cathode: The “positive” side, typically made of lithium metal oxides like LiFePO₄ (lithium iron phosphate) or NMC (nickel manganese cobalt).
-
Anode: The “negative” side, usually graphite or silicon.
-
Electrolyte: A conductive solution that shuttles lithium ions between the electrodes.
-
Separator: A thin, porous membrane that prevents the anode and cathode from touching.
Think of it as a microscopic subway system: lithium ions commute between stations (electrodes) through tunnels (electrolyte), generating electricity along the way.
Step 1: Sourcing and Preparing Materials
Every great battery starts with high-quality ingredients. Here’s what goes into ours:
A. Cathode Materials
-
Lithium: Extracted from brine pools or hard rock mines. We prioritize recycled lithium (30% of our supply) to reduce environmental impact.
-
Metal Oxides: Cobalt-free options like LiFePO₄ dominate our production, balancing performance and ethics.
B. Anode Materials
-
Graphite: Sustainably sourced from partners with zero deforestation policies.
-
Silicon Blends: Our R&D team integrates silicon to boost capacity by 20%, though it’s tricky to manage expansion during charging.
C. Electrolyte & Separator
-
Electrolyte: A mix of lithium salts (LiPF₆) and organic solvents. Our formula includes flame-retardant additives for safety.
-
Separator: Ceramic-coated polyethylene films that withstand temperatures up to 200°C.
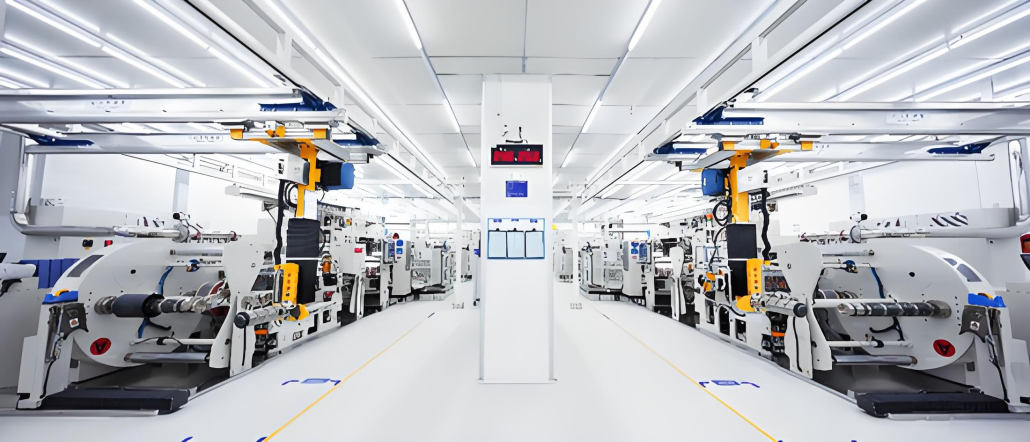
Step 2: Crafting the Electrodes
The anode and cathode are the battery’s “engine.” Here’s how we build them:
A. Mixing the Slurry
-
Cathode Slurry:
-
Lithium metal oxide + conductive carbon + binder (we use water-based PVDF alternatives).
-
Mixed into a paste with the consistency of toothpaste.
-
-
Anode Slurry:
-
Graphite + binder + water. Our proprietary mixing tech eliminates toxic solvents.
-
Why It Matters: Uneven slurry = weak spots = shorter battery life.
B. Coating the Foils
-
Cathode: Slurry spread onto aluminum foil (thinner than a human hair!).
-
Anode: Slurry coated onto copper foil.
-
Drying: Infrared ovens bake out moisture at 120°C.
Our Innovation: Laser sensors scan coatings for defects, rejecting any with >0.1% thickness variation.
C. Calendering (Pressing)
-
Giant rollers compress the electrodes, increasing density.
-
Cathode: 3.4 g/cm³ | Anode: 1.7 g/cm³. Too dense? Ions can’t move. Too loose? Capacity drops.
Step 3: Assembling the Battery
Time to turn ingredients into a working cell!
A. Cutting & Stacking
-
Electrodes are cut into strips (lasers ensure burr-free edges).
-
Separator sheets are layered between anode and cathode.
For Cylindrical Cells (e.g., AAAs): Rolled into a “jelly roll.”
For Pouch Cells (e.g., smartphones): Stacked like a high-tech lasagna.
B. Welding Terminals
-
Aluminum tabs (cathode) and nickel tabs (anode) are ultrasonically welded.
-
Our robots achieve weld strengths >15 Newtons—critical for EV vibrations.
C. Encasing the Cell
-
Cylindrical cells: Housed in steel cans.
-
Pouch cells: Sealed in aluminum-laminated film.
Step 4: The Liquid Lifeline – Electrolyte Injection
This step happens in ultra-dry rooms (<1% humidity):
-
Vacuum Filling: Electrolyte is injected under vacuum to ensure full penetration.
-
Sealing: Laser welding or heat sealing locks in the electrolyte.
Safety Note: Our electrolyte includes additives that solidify during overheating, stopping fires before they start.
Step 5: Awakening the Battery
A “newborn” battery isn’t ready yet—it needs training!
A. Formation Charging
-
A slow first charge (0.1C rate) builds the SEI (Solid Electrolyte Interphase) layer on the anode.
-
Think of SEI as the battery’s immune system—it prevents side reactions.
B. Aging & Testing
-
Cells rest for 14 days to weed out early failures.
-
Every cell undergoes:
-
Capacity Tests: Does it store the promised energy?
-
Cycle Life Tests: 500+ charge/discharge cycles simulated in 72 hours.
-
X-Ray Scans: Check for microscopic metal particles (a leading cause of shorts).
-
Our Quality Standard: Only 1 in 50,000 cells fails final inspection.
Why Manufacturing Matters
Even tiny errors can have big consequences:
-
Example: A 0.01mm coating defect in a smartphone battery could cause overheating.
-
Solution: Our AI-driven cameras inspect 10,000 cells/hour, spotting issues humans miss.
Sustainability: Built into Our DNA
-
Zero-Waste Factories: 98% of solvent waste is recycled.
-
Second-Life Programs: Used EV batteries become solar storage units.
-
Closed-Loop Recycling: Recover 95% of lithium, cobalt, and nickel.
The Future of Battery Making
We’re pioneering tomorrow’s tech today:
-
Solid-State Batteries: Safer, longer-lasting cells entering pilot production in 2026.
-
Dry Electrode Tech: Skip toxic solvents—cutting costs and CO₂ by 30%.
-
3D-Printed Batteries: Custom shapes for wearables and medical implants.